Saturday, 20 January 2018
My 2018 Make Nine Plans
Friday, 29 December 2017
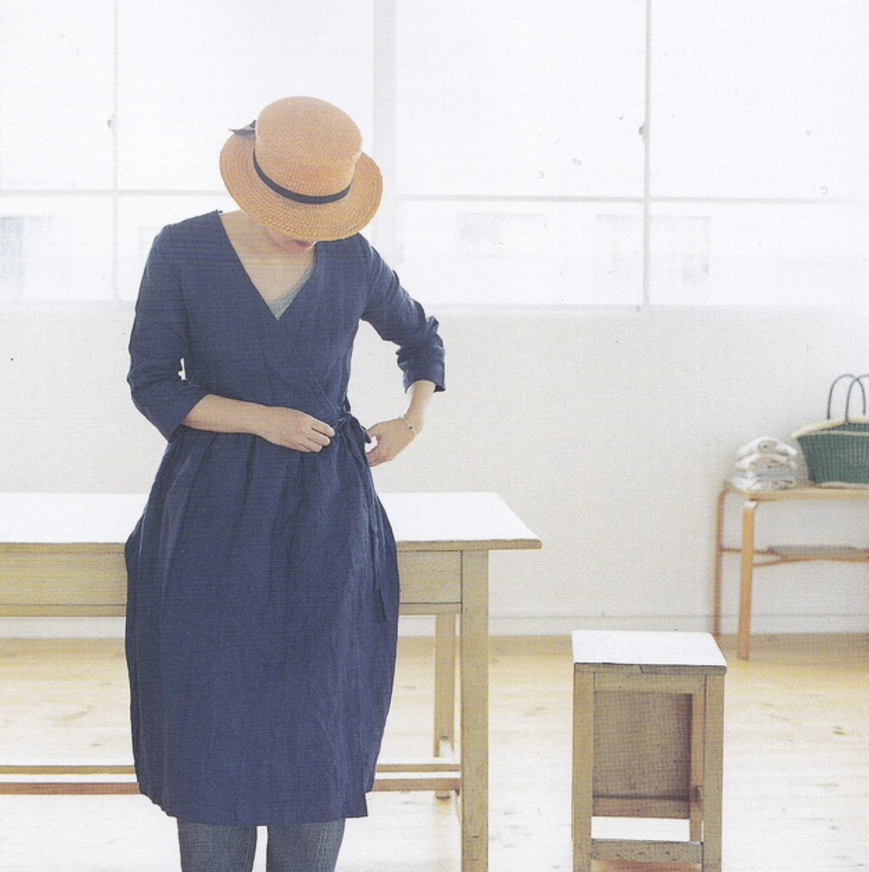
Jennifer Lauren Handmade Mayberry Dress Review
The instructions were amazing, I was very impressed with how thorough they were and how clear the diagrams were. Even though there are some slightly more advanced techniques in the pattern, the instructions are so clear that I think a beginner could tackle them. These are the best set in sleeves I've ever done!
The instructions clearly explain which PDF pages need printing for each cup size option and sleeve length, meaning that you don’t waste paper printing pattern pieces that aren’t needed.
I particularly love the different cup size options. The pattern comes with 4 different bodice front pieces for each side, which minimises the need to do any bust adjustments and means you are more likely to get a better fit straight out of the pack. This is actually the first time I’ve used an independent pattern company that provides different cup sizes and I’m very impressed with the fit.
The fabric I used wasn't ideal, it was a quilting weight cotton and it's actually a bit stiff for this project. The tie waist feature and gathered sleeve cuff would work better in something a little more fluid. I've got some lovely, fine chambray that I'm going to use for my next one. It’s also a fabric design that I loved when I ordered it, but don’t actually think the colour suits me. I love the dress so much I’ve still been wearing it loads though!
I didn't make any alterations to this pattern. The cup sizes mean the fit was pretty close without making any adjustments. The tie waist also allows some adjustments once you are wearing it. The only thing I will change next time is to lengthen the skirt a couple of inches, it's just a personal preference but I would be more comfortable if it sat at my knees. I'm 5'8 for reference, so lengthening things is a common adjustment for me.
I am planning a lot more of these. It's a great dress for the winter with long sleeves, as I don't have many. I also think the style is perfect for anything smart-casual. I could wear this to work easily as well as at the weekends, it's so easy and comfortable.
The other element of this dress that I wanted to review is its suitability for nursing and post-partum mums. Even when I was pregnant I thought it would be a great post-baby dress. I was right! The drawstring waist means it can be adjusted as your tummy shrinks down and is really flattering. I was desperate to get out of maternity clothes and wear something with a waist, but didn't want to sew anything with a fixed waistband whilst my figure was still changing. The other great thing is the button front, which allows access for breastfeeding. As it's asymmetrical, one side is easier than the other but it still works well. For easier and quicker access you could replace the buttons for snaps.
Overall I love this dress pattern and would recommend it to everyone! I'm looking forward to making a lot more, at least one for each season!
Monday, 30 October 2017
The Refashioners 2017
The best thing about this refashion is it has taken a jacket in my usual size, that wasn't the right style, and turned it into something I will wear a lot with just the addition of some ribbing and a zip. It was very simple and quick and didn't require a pattern or any difficult fabric-wrangling. It takes me back to my teenage years, where I had to adapt things to fit or suit my style and it shows that a simple approach can be successful!
Monday, 4 September 2017
Seamwork Reggie Dress - Pattern Review
I never opt to make or buy empire line dresses because I am quite pear shaped so they don't do much for me.
However, when I saw the Reggie Dress from Seamwork Magazine I completely loved it. The pattern description said it was maternity friendly, and as I was well into my 3rd trimester and running out of clothes I thought I'd give it a try!
I got the PDF pattern printed at A0 from Hobbs Reprographics for a few pounds, it was well worth it to avoid all the cutting and sticking!
I cut a straight size 8 based on a combination of my pre-pregnancy measurements and the built-in ease within the pattern. I wanted the option to wear this dress post-pregnancy so didn't want it to swamp me afterwards. It has turned out a little small in places, but it's still really comfy, I think I've put on more weight all over in the last couple of weeks than I was anticipating. I was very pleasantly surprised that I didn't have to make any adjustments, it's so easy to fit with the relaxed shape.
I found the instructions really clear like all the Seamwork patterns I've done. The only part I had to re-read and think about was the cuffs, but it results in a really neat finish inside and out so it's worth taking some time over.
I used a pale blue cotton / linen mix from my stash. It's lovely to sew and wear but takes forever to iron and still looks creased afterwards! I really fancy a gingham version, but we are at the end of summer now so might save that for next year!
I was hoping the wrap front of the dress would make this nursing friendly, but I'm not sure access will be easy enough. I'll give it a go still though! I think the relaxed shape will be quite flattering on my post-baby body and I'll be trying to avoid clingy clothes for a while!
I would really recommend this pattern, these pictures are taken at 38 weeks pregnant so it's one that could easily see you through a whole pregnancy.
Tuesday, 13 September 2016
Simple Sew Lapwing Trousers - Tutorial
The Lapwing Trousers from Simple Sew are relaxed, drawstring waist, casual trousers. I made them from this lovely, soft Tilda cotton from White Tree Fabrics.
After laundering and cutting out your fabric, lay the front trouser pieces on top of the back and align the pockets, right sides together. This allows you to understand how the trouser pieces all come together.
Lay a pocket piece on top of a trouser leg, right sides together. Sew between the notches using a 1cm seam allowance. Repeat for all pocket and trouser pieces. Make sure the fabric is right sides together and the pockets are facing the right way (pointing downwards)
Place the trouser front on top of the trouser back, right sides together, with pockets aligned and sticking out.
Sew around the pockets and finish the seam. You can overlock, zig zag stitch or just pink the seams if the fabric is stable.
Sew the trouser front to the back down the side seams using a 1.5cm seam allowance. Sew down to the first pocket notch, then start again after the second pocket notch. The line of sewing should be stepped in slightly from the line of sewing of the pocket. Finish the seam and press open.
Next, fold the trousers, right sides together, so that the back crotch seams are aligned. Sew the crotch seam with a 1.5cm seam allowance. Finish the seam and press open. Repeat for the front crotch seam.
Fold the trousers so the front is on top of the back. Align the front crotch and back crotch seam and pin. Pin down each in-seam to the hem. Sew the in-seam, finish the seam and press open.
To sew the buttonholes for the drawstring opening, I used a small button in my automatic buttonhole foot. Sew along the markings shown on the paper pattern.
Open the buttonholes using a stitch ripper with a pin across the top of the buttonhole. This stops you from ripping right through the stitches.
Fold up and press 1cm wrong sides together around the waistband. Fold the waistband in half and top stitch down from the right side to create the drawstring channel.
Fix a safety pin to the end of the drawstring and thread through the channel.
Try the trousers on to determine how much they need to be hemmed. I pressed up 1cm, then turned up the hem again by 2cm and top stitched in place.
You're finished! Easy, comfy trousers that are enjoyable to make and wear!
I hope you have fun making these, please get in touch if you have any questions, I'd love to see your trousers!
Jenny
Saturday, 20 August 2016
Simple Sew Patterns - Chelsea Collection Blouse and Skirt
I've just finished my Simple Sew Patterns Chelsea Blouse and Skirt and I love them!
The Chelsea Collection was a free pattern with Issue 29 of Love Sewing Magazine. It comes with blouse, trouser and skirt patterns. I tried the blouse and skirt patterns because I loved the look of both of them. Also, what I love about the patterns that come with magazines is that there are tips on technique right where you need them, relating specifically to the pattern.
This was the first time I had tried several techniques:
- shirring elastic
- flat fell seams
- neck facing
- key hole neckline
Whilst this is not a perfect execution of all of these, I have to say I'm very pleased with the result! My facing rolls to the front slightly, my keyhole is a bit big and I had no top stitching thread, but I still like how it's turned out. I'm just feeling very positive about it.
I really like the style of both pieces and have plans for loads more. I want to do a white blouse for work, a silk blouse for 'best' and a lighter denim skirt with metal buttons.
Sunday, 7 August 2016
Our First Trip to Centerparcs!
We have just returned from out first stay at Centerparcs Sherwood Forest and we had a great time! When we booked, about 6 months ago, I struggled to find any up to date reviews, so I thought I would write one!
About Us:
My husband and I wanted a long weekend away with our just-turned-1 year old to celebrate our first year as parents and his recent graduation. We enjoy reasonably active holidays, we were never ones to spend a week on the beach - even before children. We had heard excellent things about Centerparcs and its family-friendly vibe, so thought it would be perfect for us.
Accommodation:
The Sherwood Forest site is just over an hour away from us, so as Little S hates the car we opted for the closest park! We booked a one bedroom executive apartment. This wasn't the cheapest option, there are studio-style apartments available, but we wanted a door on the bedroom so that we had the option of an evening once the baby was asleep. Our apartment was located adjacent to the car park, which we thought was great when we turned up. We got our own allocated parking space and unloading the car was easy. We had 2 private terraces, one from the living room with a barbecue and one from the bedroom. Large sliding doors and roof lights ensured the spaces were bright and connected to the forest. I was very impressed with how well designed and spacious the apartment was.
However, the apartment was looking a little tired and dated. Some things were broken or missing and it was shabby in places. I know that the site is currently being refurbished, so I'm guessing these apartments will be upgraded in the near future. The other downside turned out to be the location. Whilst the proximity to the car park was great initially, there was no footpath from the apartment into the centre of the complex, meaning we had to walk through the car park. This means that the charm of staying 'in the forest' was completely lost. After walking around the park, there are only a handful of apartments like ours that are accessed through the car park, so we just were unlucky.
Staff and Facilities
As we expected, the staff at Centerparcs were very good, keen to help and friendly. The facilities are also excellent and families with children are very well catered for. When we arrived we went for lunch at The Pancake House and it was great! There was a little soft play area to keep Little S amused whilst we waited, there were an abundance of high chairs available, the food came quickly and I thought the prices were really reasonable. I had heard that eating out at Centerparcs was very expensive, but I thought it was on a par with any other tourist destination.
Lots of the play areas and activities are only suitable for older children. Ours isn't quite walking confidently yet, so struggled with the bark chipping in the play areas. The extra activities are mainly from 18 months+, which I understand, there isn't much that can be done with a baby.
Subtropical Paradise
The swimming pool is the main event really, it sits at the heart of the park under an impressive ETFE dome. Indoor and outdoor pools merge, Rapids and flumes weave through the space, trees and plants cascade down to the water, it looks pretty amazing. Even though it was busy, there were plenty of chairs free and space in all the pools. We didn't test out the flumes as it wasn't possible with the babe and we didn't fancy queuing solo. There were a couple of warm shallow pools with little slides that were perfect for a 1 year old. Little S got a bit cold and fed up after about 45 mins so we kept our swimming time quite short.
The changing facilities are well designed, though a few more showers would be a welcome addition. I would personally have liked to see some more slides that were adult and child friendly, ie that parents can go down with younger children. There were only the big flumes and slides for children, with no cross-over slides for everyone.
Cycling
We were expecting a rabbit-warren of cycling routes in and around the park, as cycling seems to be a focus of the stay. However, there was only one trail around the perimeter of the park, it seems everyone just uses their bikes to get to and from their accommodation. We asked about cycling at the adjacent Sherwood Pines Forest Park and you can cycle from Centerparcs into Sherwood Pines. This is not clear at all and the lady we asked seemed almost reluctant to tell us. We went off cycling to Sherwood Pines and it was fantastic. I feel like the proximity of this to Centerparcs is a real bonus and it's strange that they don't make more of it. For anyone looking to do more cycling on their break, Sherwood Pines have so many different trails, catering to different levels of fitness and ability, it's really good.
Outside Space
A little beach has been created by the boating lake, which got really busy on the sunny days. Apart from this though we couldn't find anywhere to sit down on the ground outside. We kept looking for some grass for Little S to be able to crawl round on, but there isn't any. There are play areas, but the floor covering is bark chippings - not baby friendly. Around our apartment there was the option of grass, but there were nettles everywhere so that ruled out crawling. There is a big driving range on site with lots of grass so it's obviously possible. I just think it's a shame that there is nowhere for kids to properly play outside. I guess the aim is to get everyone doing the paid activities rather than encouraging free games of rounders.
Summary
Overall we really enjoyed our stay and would definitely like to return. However, I think I will wait until we can go with another family or our son is old enough to do a bit more. We felt like we couldn't make the most of it as a couple with a baby.